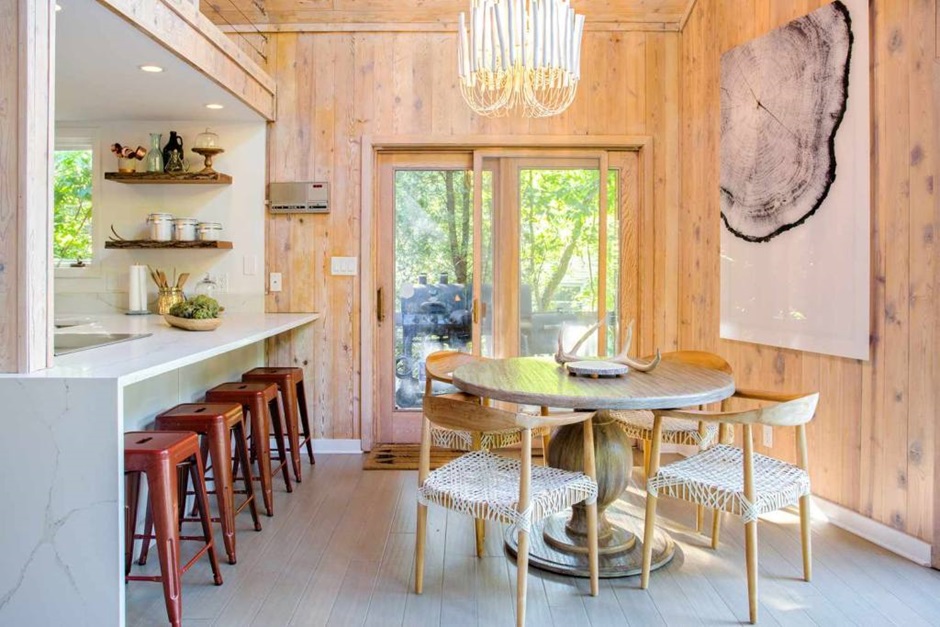
There’s something undeniably charming about the look of wood paneling in a home. It adds warmth, texture, and a sense of timeless style to any room. Whether you’re looking to revamp your living room, bedroom, or even your kitchen, installing wood paneling can be an exciting and rewarding DIY project.
In this guide, we’ll walk you through each step to help you achieve that perfect finish, ensuring your installation looks professional and stylish in any space.
1. Choosing the Right Type of Wood Paneling
Before diving into the installation process, it’s essential to choose the right type of wood paneling that suits both your style and needs. There are various options, such as shiplap, beadboard, or raised panels, each bringing its own unique aesthetic to the table. Consider the room’s design, the durability of the wood, and how the material will complement the space, particularly in terms of natural light and color scheme.
2. Gather Your Tools and Materials
Once you’ve settled on the type of paneling, the next step is to gather the necessary tools and materials. Basic items like a measuring tape, level, saw, adhesive, nails, and a hammer are essential. Additionally, having some sanding paper and wood filler on hand will help smooth out any rough edges. Depending on your project’s scale, you may also need paint or stain to finish off your panels.
3. Prepping the Walls
Now that you have your materials, it’s time to prep the walls. Start by measuring the dimensions of the room to ensure that you have enough paneling for the project. Clean the walls thoroughly to remove dust and debris, as this will help the adhesive bond more effectively. If needed, apply a primer coat to ensure a smooth surface and to avoid any potential warping of the wood over time.
While prepping, you might also consider other upgrades to enhance your home’s durability and style. For example, you can find high-quality copper roofing and cladding solutions in Australia to complement your design. These materials not only improve your home’s visual appeal but also offer long-lasting protection, making them ideal for both traditional and modern homes.
4. Cutting and Measuring the Panels
With your walls prepped, it’s time to measure and cut the wood panels. Use a measuring tape to ensure precise dimensions, marking the panels where they need to be cut. A saw will help trim the panels to fit perfectly. If you’re working in a room with uneven walls or unusual shapes, you may need to make additional adjustments. Double-check your measurements to ensure that all panels align correctly and fit snugly against the walls.
5. Installing the Wood Panels
The installation process starts by applying adhesive to the back of each panel, securing them firmly to the wall. Use nails to fasten them further, ensuring the panels remain stable and well-aligned. Begin from the bottom and work your way up, ensuring that each panel is level before moving to the next. Don’t forget to check the alignment frequently to avoid gaps or crooked installations that may affect the final appearance.
Remember, patience is key here—rushing can lead to misalignment and gaps, which will detract from the final look. Take your time to ensure a seamless finish, giving your project the polished result it deserves.
6. Filling in the Gaps and Finishing Touches
After all the panels are securely in place, the next step is to fill any gaps or cracks with wood filler. Once dry, sand the areas to create a smooth, seamless appearance. You can also choose to apply a coat of paint, stain, or sealant to protect the wood and enhance its natural beauty. Consider using a protective finish that’s appropriate for your chosen wood type and the room’s specific needs.
7. Enjoy Your New Space!
With the wood paneling installed and finished, step back and admire your hard work. The room will feel entirely transformed, with a cozy, rustic vibe that only wood paneling can bring. Not only have you given your home an elegant facelift, but you’ve also boosted its long-term value, making it a worthwhile investment for future improvements and potential resale.
Conclusion
Installing wood paneling in your home is a fantastic way to add character and warmth to any space. So, grab your tools, pick your favorite wood paneling style, and start transforming your home today. Your space will feel more personalized, cozy, and inviting in no time!